Installation instructions
To install a third-party WordPress theme, follow these steps:
1. Before you can begin the installation, you will first need to purchase a third-party theme from a developer or theme store and download it to your computer.
2. The folder you download will be compressed to make the contents smaller and should have an a.zip file format (e.g. mytheme.zip). You do not need to unzip the file on your computer.
3. For backup and restoration purposes, you should save a copy of your theme on your computer or another storage solution in case you need to reinstall it in the future.
4. Once you have the .zip file, log in to your WordPress admin panel.
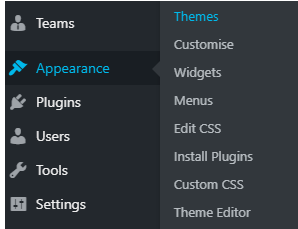
5. Scroll down to Appearance > Themes.

6. When the theme page opens, click on the Add New button at the top of the page.


12. To activate the theme, navigate back to Appearance > Themes where the theme will be displayed in the list of installed themes. Find the theme and click Activate.
